Within the domain of landscaping and property upkeep, the need to remove small trees can arise for various reasons. Perhaps these modest yet burgeoning saplings have outgrown their designated spaces, or their presence no longer aligns with your evolving landscaping vision. From assessing the tree’s condition to selecting the most suitable removal method, we will explore each facet of the removal process. Our aim is to ensure that you approach this task with both confidence and competence, enabling you to transform your outdoor space according to your vision, one tree at a time.
Tools and Material
- Shovel
- Pruning saw or chainsaw
- Loppers
- Safety goggles
- Work gloves
- Ear protection (optional)
- Personal protective equipment (PPE)
How to Remove Small Trees?
Step 1: Assess the Tree
Determine if the tree is small enough to be removed safely by hand. Small trees typically have a trunk diameter of less than 4 inches.
Step 2: Gather Safety Gear
Before you begin, ensure you’re wearing appropriate safety gear, including safety goggles, work gloves, and ear protection if using a chainsaw.
Step 3: Choose the Removal Method
There are two primary methods for removing small trees: uprooting or cutting.
Method 1: Uprooting
Uproot the Tree
Use a shovel to dig around the base of the tree, creating a trench that exposes the roots. Gradually work your way around the tree, cutting through roots as you go. – Once the majority of the roots are severed, push the tree in the direction you want it to fall. It should easily topple over.
Remove the Stump
After the tree falls, use a shovel to dig around the stump and expose the remaining roots. Cut the remaining roots with loppers or a pruning saw. Remove the stump from the ground, and fill the hole with soil.
Method 2: Cutting
Cutting the Tree
Use a pruning saw or chainsaw to cut the tree as close to the ground as possible. – Ensure that you make a clean, level cut.
Remove the Stump
After cutting the tree, you’ll be left with a stump. Depending on your preference, you can leave the stump to decay naturally over time, or you can remove it.
To remove the stump, use a shovel to dig around it, exposing the roots.Use loppers or a pruning saw to cut the roots. Rock the stump back and forth to loosen it from the ground, and then pull it out.
Dispose of Debris
Dispose of the tree debris responsibly. You can use the wood for firewood or other DIY projects, recycle it, or contact your local waste disposal services for guidance on green waste disposal.
Fill the Hole
If you uprooted the tree, fill the hole left by the uprooted tree with soil. If you cut the tree, fill in any holes around the stump’s removal.
Inspect the Area
After the tree removal, inspect the area to ensure that no sharp branches or debris remain. Make sure the ground is level and safe.
Clean Up
Clean and store your tools properly. Dispose of any waste or debris responsibly.
There are several key methods you can employ, depending on the size of the tree and your resources. Here are the most common methods in detail:
Hand Pruning Saw:
Applicability: This method is suitable for small trees with a trunk diameter of up to 2-3 inches.
Procedure:
- Start by identifying the point on the tree’s trunk where you want to make the cut.
- Make a horizontal cut on the tree’s trunk, as close to the ground as possible.
- Ensure that your cut is level and clean.
- If the tree is taller, continue cutting until it falls.
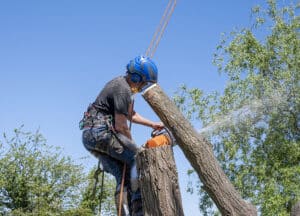
Chainsaw:
Applicability: Chainsaws are suitable for small to medium-sized trees with a trunk diameter of up to 6-8 inches.
Procedure:
- Put on all necessary safety gear, including goggles, gloves, and ear protection.
- Determine the direction in which you want the tree to fall.
- Make a horizontal cut (the notch cut) on the side of the tree facing the desired fall direction. This cut should go about one-third of the way through the trunk and create a notch.
- Create a horizontal cut (the back cut) on the opposite side slightly above the notch cut. This cut should meet the notch cut to create a 70-80-degree angle.
As the back cut is completed, the tree will start to lean and fall in the desired direction.
Felling Wedges:
Applicability: Felling wedges can be used in conjunction with chainsaws for more control over the direction of the fall.
Procedure:
- After making the notch and back cuts, insert plastic or wooden felling wedges into the notch cut.
- The wedges will help guide the tree’s fall in the desired direction.
- As the tree starts to lean and fall, the wedges will ensure a controlled descent.
Rope and Pull:
Applicability: This method is suitable for small trees that you can’t easily access with a chainsaw or when you want to control the direction of the fall.
Procedure:
- Tie a sturdy rope to the tree, preferably above the notch cut.
- Stand at a safe distance and use a vehicle or another method to apply gentle but steady tension on the rope.
- As tension increases, the tree will lean and fall in the direction of the applied force.
Chemical Method (Stump Removal):
Applicability: This method is for the removal of the stump after cutting down the tree.
Procedure:
- After cutting down the tree, there will be a stump left behind.
- Drill several holes into the stump and apply a stump removal chemical as directed.
- Over time, the chemical will soften the stump, making it easier to remove or decay naturally.
Manual Uprooting (For Very Small Trees):
Applicability: This method is for very small trees with shallow roots.
Procedure:
- Use a shovel to dig around the base of the tree, exposing the roots.
- Gradually cut through the roots as you dig.
- Once the majority of roots are severed, you can often push the tree over.
Safety measures before remove small trees:
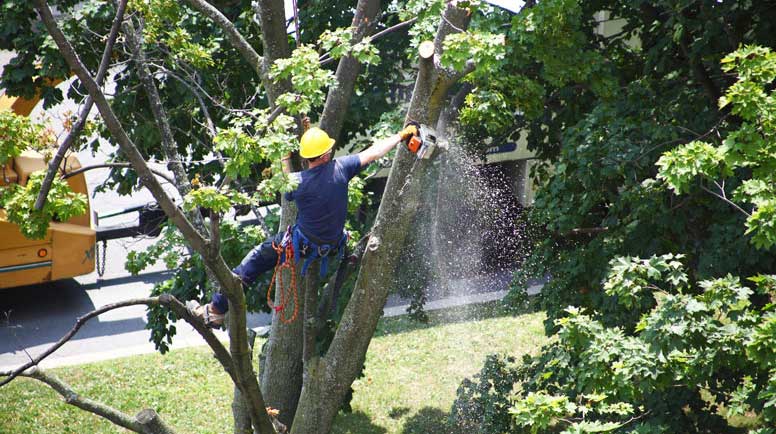
Safety is paramount when cutting small trees, just as it is with larger trees. Here are essential safety measures to follow when cutting small trees:
Wear Personal Protective Equipment (PPE):
- Safety Goggles
- Ear Protection
- Work Gloves
- Hard Hat
- Steel-Toed Boots
Inspect Equipment:
- Before starting, ensure that all cutting tools (pruning saw, chainsaw, loppers, etc.) are in good working order.
- Check for proper chain tension and sharpness if using a chainsaw.
Clear Work Area:
- Remove any obstacles or tripping hazards from the area where you’ll be working.
- Keep children, pets, and bystanders at a safe distance from the work zone.
Plan the Cut:
- Determine the direction in which you want the tree to fall before making your cuts.
- Ensure there are no structures, vehicles, or people in the intended fall path.
Safe Cutting Techniques:
- Stand on the uphill side of the tree, so you have an escape path if the tree starts to fall unexpectedly.
Clear the Escape Route:
- Always have a clear escape route planned. Be prepared to move quickly if the tree starts to fall unpredictably.
Conclusion
The process of cutting small trees, though often considered a simpler task compared to removing larger ones, demands the same level of caution, preparation, and respect for safety. Every cut, every decision, and every precaution you take contributes to the successful completion of the task at hand. With each tree that you prune or remove, you not only transform your landscape but also gain valuable experience and confidence in managing your property. So, approach the task with diligence, prioritize safety above all else, and let the satisfaction of a job well done be your ultimate reward. Happy tree cutting!