Trees are a wonderful asset to any environment, providing shade, beauty, and a connection to nature. However, there are occasions when tree removal is necessary, whether due to safety issues, disease, or a lack of space. While professional tree removal services are available, many homeowners prefer to tackle the process themselves by performing DIY tree removal and cutting. This guide is intended to give you the best guidance and critical tips for safely and successfully handling tree removal and cutting jobs on your property.
The Importance of Diy Tree Removal and Cutting
The significance of DIY tree removal and cutting lies in the empowerment it provides to homeowners. While professional tree removal services are easily available and important, there are times when taking matters into your own hands is necessary. Homeowners can handle safety problems, manage landscape aesthetics, and even save money by performing their own tree removal and trimming.
It develops a stronger connection to the environment, allowing you to actively participate in the care of your land. However, it is critical to tackle these jobs with regard to safety regulations, careful planning, and the essential equipment to assure good outcomes. By acquiring these abilities, you not only improve your property but also get vital information on tree care and management.
Analyzing the Situation
Before you begin a DIY tree removal and cutting endeavor, you must thoroughly examine the problem. Here are some crucial points to consider:
Identifying the Causes of Tree Removal
Determine why the tree must be removed. Is it a menace to public safety, diseased beyond recovery, or hindering a construction project? Understanding the fundamental causes can assist you in making appropriate plans.
Calculating Tree Size and Complexity
Examine the tree’s size and complexity. Small trees with a simple trunk may be suitable for DIY removal; however, huge, complex trees may necessitate professional assistance.
Examining Local Regulations
Check your local regulations and permission requirements for tree removal. Some towns prohibit the removal of trees, particularly if they are old or considered significant.
Tools Needed for DIY Tree Removal
- Chainsaw: A reliable chainsaw is essential for cutting down the tree and removing branches.
- Pruning Shears: Use pruning shears for smaller branches and limbs.
- Loppers are ideal for thicker branches that pruning shears can’t handle.
- Safety Gear: Invest in safety gear, including a hard hat, safety goggles, ear protection, gloves, and steel-toed boots.
Plan the Project
Create a concise project timeline that includes start and end dates. A timeline helps you stay organized and ensures that you designate enough time for each aspect of the project.
Safety should be your main priority. Conduct a thorough risk assessment to identify potential dangers and risks related to your unique tree and project site. Typical dangers include:
- Branches crashing to the ground
- A tree falls in an unforeseen direction.
- Nearby structures or electricity wires
- Obstacles on the ground
Clear the space around the tree of any impediments or potential risks. Make sure there are no vehicles, structures, or important items inside the tree’s potential fall zone. Additionally, identify a clear escape route away from the falling direction of the tree and explain it to everyone working on the operation.
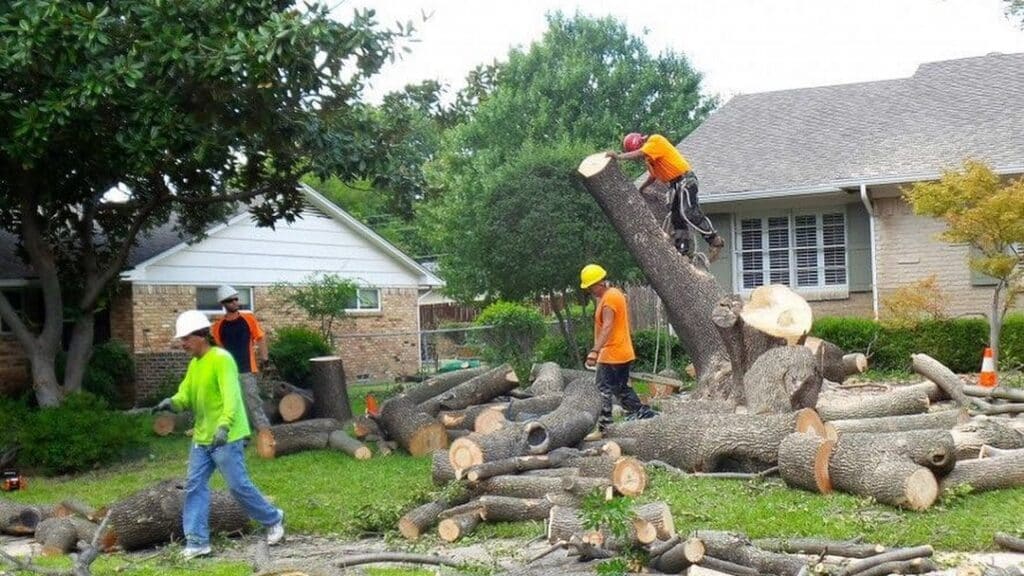
Tree-Cutting Techniques
Accurate tree-cutting procedures are critical for a regulated and safe removal operation. Here’s a step-by-step guide to tree removal:
Make a Notch Cut:
Begin by making a notch cut on the side of the tree facing the direction you want it to fall. This notch cut should be a 70-degree angle notch with two cuts: a horizontal cut and a downward-angled cut meeting at a point.
Make the Felling Cut:
After making the notch cut, make the felling cut on the opposite side of the tree, a few inches above the bottom of the notch. The felling cut should match the notch cut to guide the tree’s fall.
Retreat Safely:
As soon as the felling cut is complete, retreat along your predetermined escape route to a safe distance.
Select the appropriate tree-felling method.
Different tree felling techniques are appropriate for varied tree sizes and conditions. Here are two common methods:
Directional Felling:
This approach is best suited for trees with plenty of space around them. The notch and felling cut are used to direct the tree’s fall in a specified direction. It gives you more control over the landing position of the tree.
Notch cutting:
Notch cutting is ideal for trees in small locations or near structures. The notch is cut to direct the tree’s fall. Notch cutting necessitates precise cuts to guarantee that the tree falls in the right direction.
Understand safe cutting angles and directions.
Understanding the importance of cutting angles and directions is critical for a controlled and safe tree fall. The notch and felling cuts must be precise in order to direct the tree exactly where you want it to land. Remember the following points:
The notch should be opened in the direction of the intended descent.
Make sure the notch is neither too shallow nor too deep.
The felling cut must be level and perfectly aligned with the notch.
The tree will fall toward the notch.
Remember, a tree can unexpectedly fall in the opposite direction if not properly cut and balanced, posing a significant risk.
Managing Potential Hazards
Handle falling branches and debris:
Falling branches and debris might endanger people on the ground during the tree-cutting procedure. Create solutions to manage these hazards:
Ropes:
Securely attach ropes to branches that are too huge to fall safely. This allows you to direct the direction of their fall.
Clear the area.
Ensure that no one, including spectators and pets, is in the drop zone during cutting. Clear the space and create a safe boundary around the work area.
Be Prepared for Emergencies
Safety should always come first, and being prepared for situations is essential. Learn emergency procedures, including how to use first-aid items. Maintain a well-stocked first-aid kit.
FAQS
Is DIY tree removal safe?
DIY tree removal can be safe when approached with careful planning, the right tools, and knowledge. However, if you’re uncertain or the tree is large and complex, it’s advisable to consult a professional.
Do I need a permit for DIY tree removal?
Depending on your location and local regulations, you may require a permit for tree removal. Check with your local authorities to ensure compliance.
When is the ideal time of year to do DIY tree removal?
Late fall to early spring, when trees are dormant, is frequently the optimum period for do-it-yourself tree removal. To minimize damage to other plants, avoid the growing season.
What do I do with the tree debris when it has been removed?
Tree waste can be recycled, chipped for mulch, or utilized as firewood. For details on proper garbage disposal, contact your local waste disposal facility.
Conclusion
DIY tree removal and trimming can be a satisfying and cost-effective approach to managing trees on your property. However, it comes with great duties. Safety, adequate preparation, the right tools, and adherence to local standards are all necessary for success. If you are ever unsure, or if the tree is unusually enormous or complex, do not hesitate to seek professional assistance. With the correct knowledge and procedures, you can effectively complete tree removal operations while protecting yourself and your property.